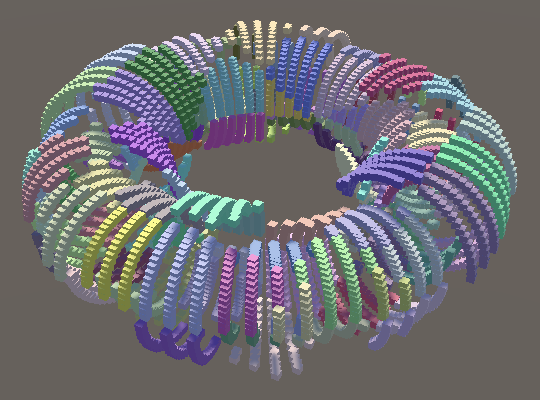
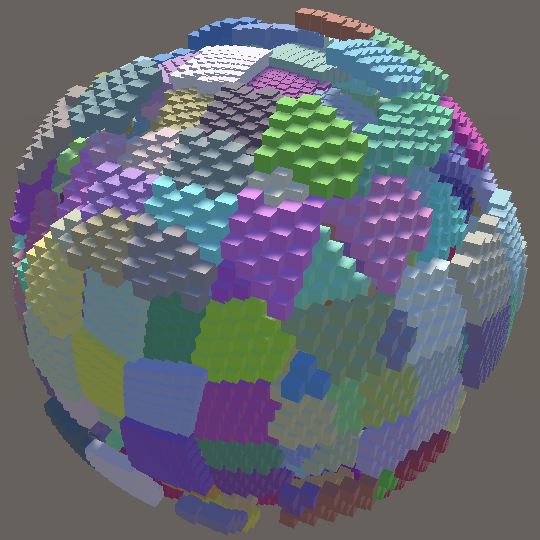
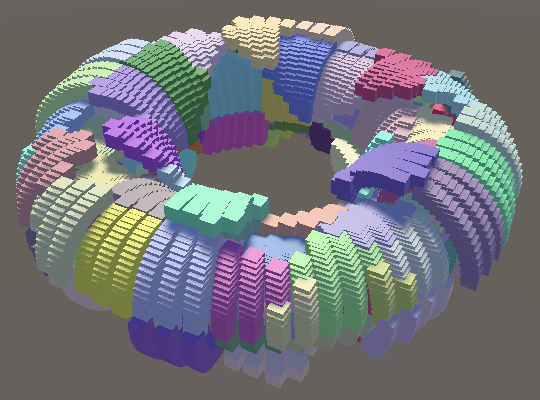
翻译—-Pseudorandom Noise-Hashing Space
如果你觉得这篇教程不错,请去支持原作者
此教程使用的Unity版本为2020.3.6f1
- 将Hash效果转换到3D空间中
- 创建各种形状的立体模型
- 手动制作向量化的Jobs
- 创建一个形状生成器job模板类
这是伪随机噪音系列教程的第二篇.这次我们会修改hash算法让他能在空间中创建任意的形状.
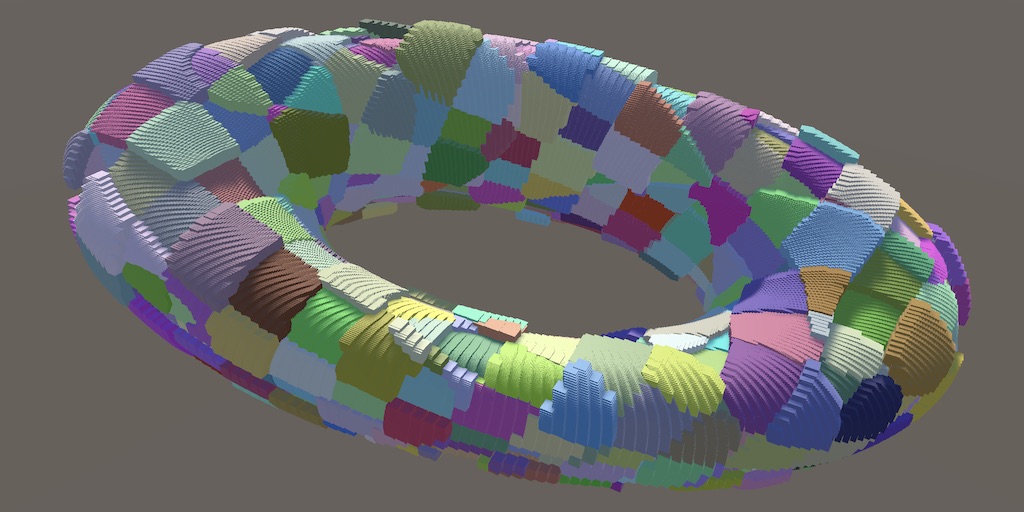
在前一个教程里,我们通过Hash算法计算UV值后给对每一个采样点赋予了不同的颜色和位置,每一个采样点都拥有了自己的Hash值.在本教程中,我们将会用空间hash效果来替换原来的平面hash效果.让hash值的计算不依赖采样点,这样可以使hash的值,不影响最终的分辨率和所生成的形状.
1.1 调整缩放(Changing Scale)
为了说明Hash算法的效果可以与分辨率解耦,让我们先把有效分辨率翻倍,在HashJob类的Execute方法中,在Eat之前将UV值翻倍.
1
2
3
4
5
6
7
8
9
10
11
12
13
14
15
| public void Execute(int i)
{
int v = (int)floor(invResolution * i + 0.00001f);
int u = i - resolution * v - resolution / 2;
v -= resolution / 2;
u *= 2;
v *= 2;
hashes[i] = hash.Eat(u).Eat(v);
}
|
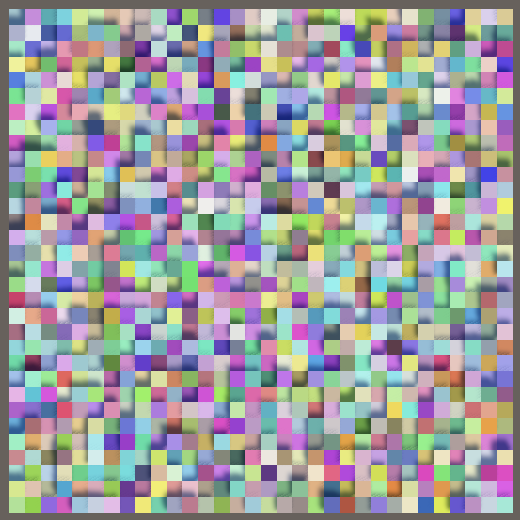
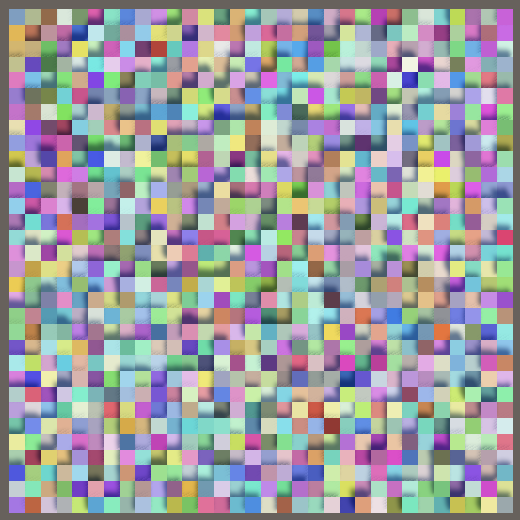
正常和两倍; 分辨率32; seed为0
翻倍UV坐标会得到一个不同的效果,但是看上去并没有本质上的不同.我们只是放大了hash效果的域(domain),并且以两倍的速度让域移动以生成可视化的效果.我们还可以做缩小处理,比如像下面这样将坐标除以4.
来自特兹卡特的提醒
域(domain)这个概念该怎么理解?
打个比方,整个Hash生成的可视化平面就如同一张带有花纹的无限大的桌面,但是我们只能通过一块方形的窗口,才能看到上面的花纹.这个窗口就是域.移动这个窗口的位置,就能看到桌面上不同地方的花纹,窗口的大小也就是我们能看到的范围的大小.
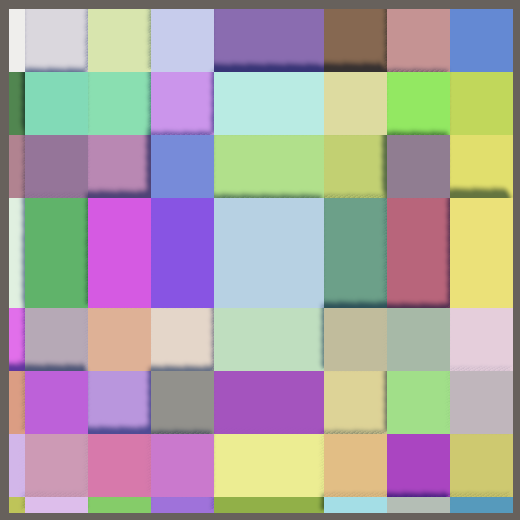
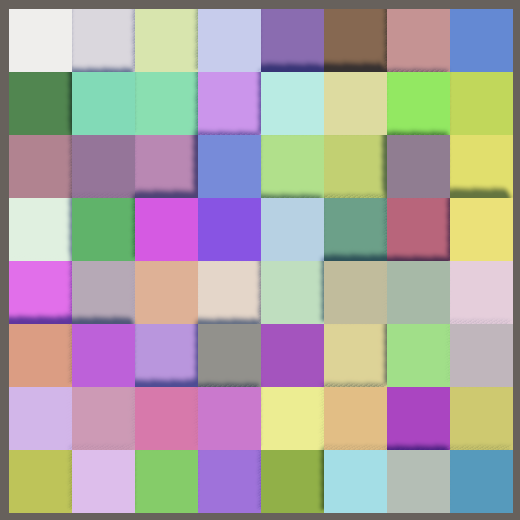
这是同一个参数4x4采样所呈现的效果,看上去好像是我们降低了它的分辨率一样.但是实际上是由于整数除法在0附近四舍五入之后造成的结果,所以看上去图像就不规则和重复了.
这两个问题都可以通过这样的方法来解决,先将UV坐标先看做float类型,把计算结果标准化到[-0.5,0.5]之间,最后使用floor把float类型的计算结果转换成int.
1
2
3
4
5
6
7
8
9
10
11
12
13
14
15
16
| public void Execute(int i)
{
float vf = floor(invResolution * i + 0.00001f);
float uf = invResolution * (i - resolution * vf + 0.5f) - 0.5f;
vf = invResolution * (vf + 0.5f) - 0.5f;
int u = (int)floor(uf);
int v = (int)floor(vf);
hashes[i] = hash.Eat(u).Eat(v);
}
|
为了把坐标刻度转换成相同的,我们需要在floor之前先乘以我们当前所使用的分辨率(32),再除以4来达到缩小到1/4的效果.
1
2
3
4
|
int u = (int)floor(uf * 32f / 4f);
int v = (int)floor(vf * 32f / 4f);
|
1.2 域的变换(Domain Transformation)
现在要把域的硬编码型配置,改为动态型配置,而且不再局限于只能对域进行缩放,而是要把它当做一个普通的3D空间来看待,可以对其应用各种移动,旋转和缩放,就像变换游戏中的对象一样.不过我们并不能只靠Unity自带的Transform来完成这个功能,所以还需要制定一个SpaceTRS结构体,里面包含一组坐标变换所需的字段.
1
2
3
4
5
6
| using Unity.Mathematics;
public struct SpaceTRS
{
public float3 translation, rotation, scale;
}
|
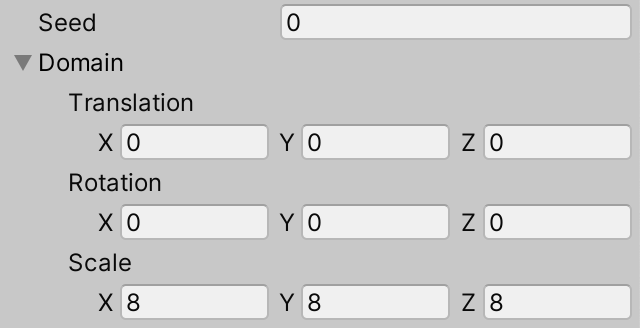
在HashVisualization类中添加一个SpaceTRS的字段并初始化,将scale设置为8,暂时用硬编码匹配当前的设置.
1
2
3
4
5
| [SerializeField]
SpaceTRS domain = new SpaceTRS
{
scale = 8f
};
|
为了使上面的序列化功能可以运行,我们需要在SpaceTRS类的头上加一个Attribute修饰符System.SerializeField.
1
2
| [System.Serializable]
public struct SpaceTRS { … }
|
想要应用一个3D空间中的位移变换,或者把对象设置到某个点上,需要一个4x4的变换矩阵和一组向量(vector)数据进行乘法计算.添加一个返回float4x4的公共get方法.旋转参数必须是一个四元数.可以用Unity自带的四元数函数quaternion.EulerZXY来生成它,不过还需要使用math.radians函数把输入的数据先转换为弧度.
1
2
3
4
| public float4x4 Matrix
{
get { return float4x4.TRS(translation, quaternion.EulerZXY(math.radians(rotation)), scale); }
}
|
因为位移旋转缩放矩阵(变换矩阵)的第四行永远都是{0,0,0,1},所以我们可以缩减一下数据量,用一个float3x4的矩阵来代替.不过并没有这两种类型的矩阵的直接转换方式,我们需要调用math.float3x4来手动创建,把第四列的参数按照如下方式填入函数中,矩阵中这4列的命名是c0,c1,c2,c3.因为我们只需要前3个数据,所以只需调用xyz这个属性.
来自特兹卡特的提醒
我翻译到这里发现这一堆内容纯属废话,当然原作者是把看教程的人当完全不懂的人一样来对待,才写得如此详细.
但是如果你连基本的3D空间变换都不懂就来看这里的内容,仅靠作者这点只言片语的描述来理解,纯属自己折磨自己,点此链接先去学基本变换吧.
1
2
3
4
5
6
7
8
9
10
11
| public float3x4 Matrix
{
get
{
float4x4 m = float4x4.TRS(
translation,
quaternion.EulerZXY(math.radians(rotation)),
scale);
return math.float3x4(m.c0.xyz, m.c1.xyz, m.c2.xyz, m.c3.xyz);
}
}
|
1.3 应用矩阵的数据(Applying the Matrix)
为了在HashJob.Execute中应用变换矩阵,我们必须得有一个float3的坐标数据.使用[-0.5,0.5]范围内的UV坐标来创建一个XZ平面上的坐标数据,然后使用XZ这两个分量来计算坐标的hash值.
1
2
3
4
5
6
7
8
9
10
11
12
13
| public void Execute(int i)
{
float vf = floor(invResolution * i + 0.00001f);
float uf = invResolution * (i - resolution * vf + 0.5f) - 0.5f;
vf = invResolution * (vf + 0.5f) - 0.5f;
float3 p = float3(uf, 0f, vf);
int u = (int)floor(p.x);
int v = (int)floor(p.z);
hashes[i] = hash.Eat(u).Eat(v);
}
|
接着增加一个float3x4类型的domainTRS的字段到job类中,然后在Execute中将矩阵和坐标点相乘.这个mul方法需要一个float4类型的数据而非float3类型,所以我们把float4的第四个数据设置为1,这个1最终会与矩阵的第四列相乘,而且并不会对最终数据产生任何影响,所以Burst编译器将会优化这个操作.
1
2
3
4
5
6
7
8
| public float3x4 domainTRS;
public void Execute(int i)
{
…
float3 p = mul(domainTRS, float4(uf, 0f, vf, 1f));
…
}
|
如果你现在去看Burst编译器编译后的代码,你会发现我们的job不再会进行向量化优化.因为现在操作的对象是一个vector类型而不是一个值.现在先不管他,后面再处理.
为了应用这个域变换的效果,把domain.Matrix添加到HashJob的构造函数中.
1
2
3
4
5
6
7
8
| new HashJob
{
hashes = hashes,
resolution = resolution,
invResolution = 1f / resolution,
hash = SmallXXHash.Seed(seed),
domainTRS = domain.Matrix
}.ScheduleParallel(hashes.Length, resolution, default).Complete();
|
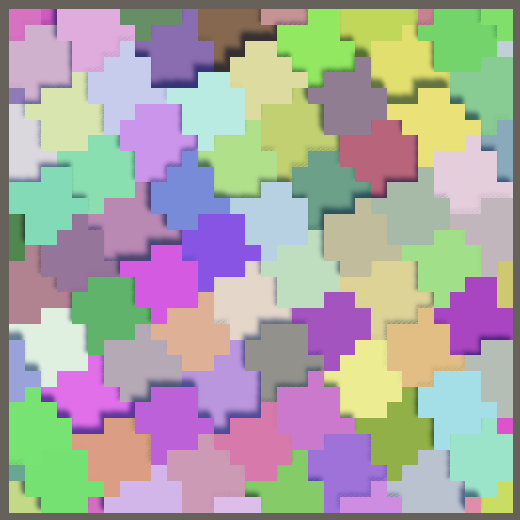
现在我们就可以移动,旋转,缩放这个域了.这里看到的效果就是经过移动,旋转和缩放后的.如果把这域向右移动,就会感觉到hash图像在向左移动,因为这个平面本身是固定不动的.同样的,旋转操作也会出现反向效果,增加缩放值会使图像变小.
1.4 3D Hashing
现在做好的空间变换功能可以在3D空间中运行,比如,在Y方向上移动这个显示范围,但是不会有任何的变化,因为我们的hash计算只依赖于X和Z轴.同样,如果你绕X轴旋转hash方块会拉长,从中心延伸到平面边缘.

为了使3D的hash效果更加完善,我们需要将3个坐标都进行处理.
1
2
3
4
5
| int u = (int)floor(p.x);
int v = (int)floor(p.y);
int w = (int)floor(p.z);
hashes[i] = hash.Eat(u).Eat(v).Eat(w);
|
现在绕Y轴旋转也会产生hash正确的效果了,并且绕任一轴旋转90度还能看到一个方形的hash切片效果.
2 采样形状(Sample Shapes)
鉴于我们有了一个3D的hash效果,就不在仅限于平面上操作它,我们可以创建其他的Job功能来制作任意的形状了.
2.1 形状生成器(Shapes Job)
我们不需要创建许多不同版本的HashJob,而需要把创建hash形状的job和采样hash体积的功能分开.先建立一个静态类Shapes,目前只需要包含一个Job结构体,来生成平面型的采样点并保存在一个**NativeArray**结构中.对于域的变换操作并不是这里的工作,所以就只需要分辨率和分辨率倒数这两个数据.
1
2
3
4
5
6
7
8
9
10
11
12
13
14
15
16
17
18
19
20
21
22
23
24
25
26
27
28
| using Unity.Burst;
using Unity.Collections;
using Unity.Jobs;
using Unity.Mathematics;
using static Unity.Mathematics.math;
public static class Shapes
{
[BurstCompile(FloatPrecision.Standard, FloatMode.Fast, CompileSynchronously = true)]
public struct Job : IJobFor
{
[WriteOnly]
NativeArray<float3> positions;
public float resolution, invResolution;
public void Execute(int i)
{
float2 uv;
uv.y = floor(invResolution * i + 0.00001f);
uv.x = invResolution * (i - resolution * uv.y + 0.5f) - 0.5f;
uv.y = invResolution * (uv.y + 0.5f) - 0.5f;
positions[i] = float3(uv.x, 0f, uv.y);
}
}
}
|
紧接着增加一个静态方法ScheduleParallel,用来负责Job的生成和调度,返回值是JobHandle.这个方法并不需要分辨率倒数这个参数,因为可以在内部自行计算.
1
2
3
4
5
6
7
8
9
10
11
12
13
14
| public struct Job : IJobFor
{
…
public static JobHandle ScheduleParallel(NativeArray<float3> positions, int resolution, JobHandle dependency)
{
return new Job
{
positions = positions,
resolution = resolution,
invResolution = 1f / resolution
}.ScheduleParallel(positions.Length, resolution, dependency);
}
}
|
2.2 生成位置点(Generating Positions)
我们将向HashJob加一些新的东西来处理位置点,添加一个Shader的注册ID(_Positions),一个NativeArray<float3**>和一个装位置点的ComputeBuffer**.并做好初始化和清理工作.
1
2
3
4
5
6
7
8
9
10
11
12
13
14
15
16
17
18
19
20
21
22
23
24
25
26
27
28
29
30
31
32
33
34
| private static int hashesId = Shader.PropertyToID("_Hashes");
private static int configId = Shader.PropertyToID("_Config");
private static int positionsId = Shader.PropertyToID("_Positions");
…
NativeArray<uint> hashes;
NativeArray<float3> positions;
ComputeBuffer hashesBuffer, positionsBuffer;
MaterialPropertyBlock propertyBlock;
void OnEnable()
{
int length = resolution * resolution;
hashes = new NativeArray<uint>(length, Allocator.Persistent);
positions = new NativeArray<float3>(length, Allocator.Persistent);
hashesBuffer = new ComputeBuffer(length, 4);
positionsBuffer = new ComputeBuffer(length, 3 * 4);
…
}
void OnDisable()
{
hashes.Dispose();
positions.Dispose();
hashesBuffer.Release();
positionsBuffer.Release();
hashesBuffer = null;
positionsBuffer = null;
}
|
在OnEnable中把Shape的创建操作放在Hash之前,再将生成的handle传给HashJob,因为位置点(positions)的数据必须先被处理,后续还需要把这个位置点(positions)的数据传给GPU.
1
2
3
4
5
6
7
8
9
10
11
12
13
| JobHandle handle = Shapes.Job.ScheduleParallel(positions, resolution, default);
new HashJob
{
…
}.ScheduleParallel(hashes.Length, resolution, handle).Complete();
hashesBuffer.SetData(hashes);
positionsBuffer.SetData(positions);
propertyBlock ??= new MaterialPropertyBlock();
propertyBlock.SetBuffer(hashesId, hashesBuffer);
propertyBlock.SetBuffer(positionsId, positionsBuffer);
|
修改对应的Shader代码,利用刚刚传进来的位置点数据,来代替之前的硬编码平面数据,这样就能用上垂直方向(Z轴)上的数据了.
1
2
3
4
5
6
7
8
9
10
11
12
13
14
15
16
17
18
19
20
21
22
| #if defined(UNITY_PROCEDURAL_INSTANCING_ENABLED)
StructuredBuffer<uint> _Hashes;
StructuredBuffer<float3> _Positions;
#endif
float4 _Config;
void ConfigureProcedural()
{
#if defined(UNITY_PROCEDURAL_INSTANCING_ENABLED)
unity_ObjectToWorld = 0.0;
unity_ObjectToWorld._m03_m13_m23_m33 = float4(
_Positions[unity_InstanceID],
1.0
);
unity_ObjectToWorld._m13 += _Config.z * ((1.0 / 255.0) * (_Hashes[unity_InstanceID] >> 24) - 0.5);
unity_ObjectToWorld._m00_m11_m22 = _Config.y;
#endif
}
|
在HashJob添加一个positions字段来作为位置的输入,然后只需要查询到在GPU中生成好的数据就行了,而不是自己去算一个.然后对域应用这个坐标点作为变换.现在hash算法不再依赖采样分辨率,可以移除相关的数据和操作了.
1
2
3
4
5
6
7
8
9
10
11
12
13
14
15
16
17
18
19
20
21
22
23
| [ReadOnly]
public NativeArray<float3> positions;
[WriteOnly]
public NativeArray<uint> hashes;
public SmallXXHash hash;
public float3x4 domainTRS;
public void Execute(int i)
{
float3 p = mul(domainTRS, float4(positions[i], 1f));
…
}
|
再修改OnEable中的相关位置.
1
2
3
4
5
6
7
8
9
| new HashJob
{
positions = positions,
hashes = hashes,
hash = SmallXXHash.Seed(seed),
domainTRS = domain.Matrix
}.ScheduleParallel(hashes.Length, resolution, handle).Complete();
|
现在我们依然可以看到可视化的Hash效果,不过现在是依靠两个Job功能在计算,而不是原来的一个.
我们在采样时对域应用了变换,同样也能在生成形状时应用变换.在Shapes.Job中增加一个float3x4字段,然后在Execute函数中做如下操作来计算最终位置.
1
2
3
4
5
6
7
| public float3x4 positionTRS;
public void Execute(int i)
{
…
positions[i] = mul(positionTRS, float4(uv.x, 0f, uv.y, 1f));
}
|
在这种情况下就可以直接用Transform的矩阵数据来控制,并且可以很好的进行变换而不是被固定在原点上.为了让操作更加方便,添加一个float4x4参数到ScheduleParallel方法中,并提取出3x4的数据对Job进行初始化.
1
2
3
4
5
6
7
8
9
10
| public static JobHandle ScheduleParallel(NativeArray<float3> positions, int resolution, float4x4 trs, JobHandle dependency)
{
return new Job
{
positions = positions,
resolution = resolution,
invResolution = 1f / resolution,
positionTRS = float3x4(trs.c0.xyz, trs.c1.xyz, trs.c2.xyz, trs.c3.xyz)
}.ScheduleParallel(positions.Length, resolution, dependency);
}
|
在HashVisualization.OnEnable函数中做调度操作时,就需要把local-to-world矩阵传递给形参.
1
| JobHandle handle = Shapes.Job.ScheduleParallel(positions, resolution, transform.localToWorldMatrix, default);
|
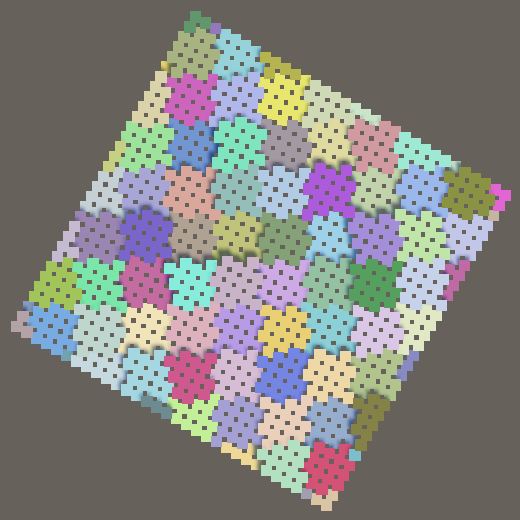
现在进行变换操作时,形状效果就会做出相应的改变,至少会在进入PlayMode时改变一次.但是请注意看,每一个单独的cube现在还是轴对齐和未缩放状态.
我们可以同时旋转和缩放整个图形吗?
可以,通过向GPU传入一个合适的矩阵,然后用Shader进行最终的计算就行了.但是如果传入的缩放值不是等比例的,就会出现一些问题,目前我们先假定缩放是等比例的.
2.5 更新位置(Updating Positions)
为了让变换效果可以在PlayMode下运行,必须把Job功能从OnEnable转移到Update中,由于并不需要每一帧都更新数据,在HashVisualization添加一个bool字段isDirty来控制更新的频率,当可视化效果发生数据变化时(isDirty)才进行更新.因为在OnEnable被调用时总是需要更新,所以在这里把isDirty赋值为true.
1
2
3
4
5
6
7
| bool isDirty;
void OnEnable()
{
isDirty = true;
…
}
|
在Update中检查isDirty字段,如果为true就调用更新流程并且把它设置为false.
1
2
3
4
5
6
7
8
9
10
11
12
13
14
15
16
17
18
19
20
21
22
| void Update()
{
if (isDirty)
{
isDirty = false;
JobHandle handle = Shapes.Job.ScheduleParallel(positions, resolution, transform.localToWorldMatrix, default);
new HashJob
{
positions = positions,
hashes = hashes,
hash = SmallXXHash.Seed(seed),
domainTRS = domain.Matrix
}.ScheduleParallel(hashes.Length, resolution, handle).Complete();
hashesBuffer.SetData(hashes);
positionsBuffer.SetData(positions);
}
Graphics.DrawMeshInstancedProcedural(…);
}
|
这就意味着我们不再需要在OnEnable中执行上面的工作了.
1
2
3
4
5
6
7
8
9
10
11
12
13
14
15
16
17
18
| void OnEnable()
{
…
propertyBlock ??= new MaterialPropertyBlock();
…
}
|
最后在Update里,还要在(整体的)变换发生后刷新可视化效果,这一步是由Transform.hasChanged属性控制的,当变化发生后,它会自动被设置为true.但是它并不会被自动设置回false,所以需要在检测到变化发生后手动将它改回去.
1
2
3
4
5
6
7
| if (isDirty || transform.hasChanged)
{
isDirty = false;
transform.hasChanged = false;
…
}
|
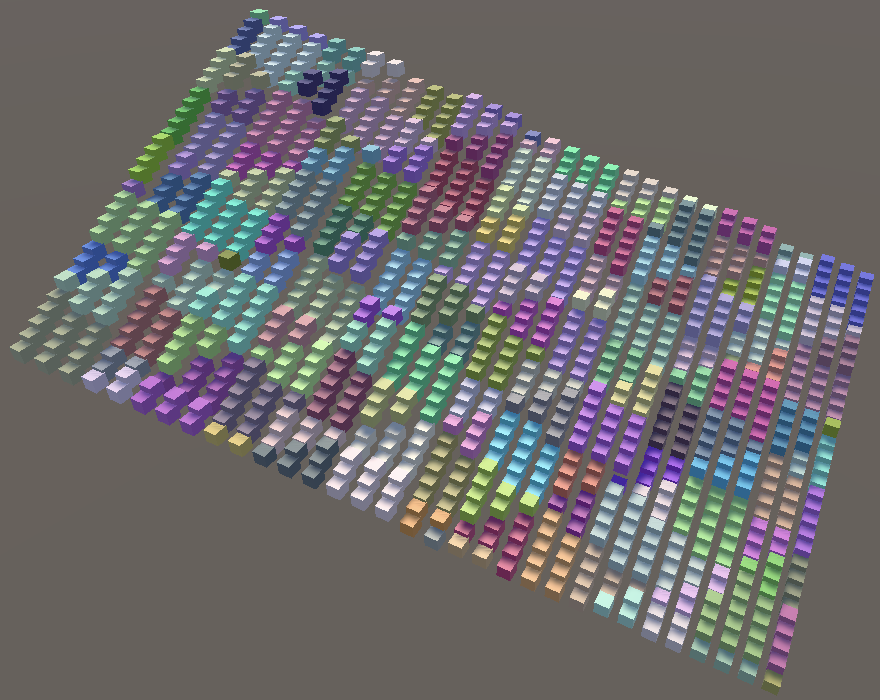
现在,在PlayMode中所有的数据变化都会被立即响应并绘制(包括对整体的3D变换),我们就可以方便地研究立体的hash(HashVolume)效果了.
2.6 偏移(Displacement)
如果这个平面可以朝向任意方向,那我们基于hash计算所得到的偏移效果就应该取决于平面的法线而不是世界坐标系下的Y轴.一般来说单个采样点的位置是取决于整个形状样子的,但是有可能这个形状就根本不是一个平面,所以在这种情况下,每一个单独的采样点都必须有自己的移动规则.为了做到这个效果,我们先用一个displacement字段来替换掉verticalOffset,这样就能使采样点不再依赖分辨率,而是变成像是在世界坐标系下的单位.
1
2
3
4
5
6
7
8
9
10
11
12
13
14
15
|
[SerializeField, Range(-0.5f, 0.5f)]
float displacement = 0.1f;
…
void OnEnable()
{
…
propertyBlock ??= new MaterialPropertyBlock();
propertyBlock.SetVector(configId, new Vector4(resolution, 1f / resolution, displacement));
}
|

我们需要让采样点沿着形状的表面法向量移动,所以Shapes.Job得输出一个法线数据.在当前例子的情况下,XZ平面的法线方向就是垂直于这个平面向上.按照下面的方式修改代码.
1
2
3
4
5
6
7
8
9
10
11
12
13
14
15
16
17
18
19
20
21
22
23
24
25
26
| public struct Job : IJobFor
{
[WriteOnly]
NativeArray<float3> positions, normals;
public float resolution, invResolution;
public float3x4 positionTRS;
public void Execute(int i)
{
…
positions[i] = mul(positionTRS, float4(uv.x, 0f, uv.y, 1f));
normals[i] = normalize(mul(positionTRS, float4(0f, 1f, 0f, 1f)));
}
public static JobHandle ScheduleParallel(NativeArray<float3> positions, NativeArray<float3> normals, int resolution,float4x4 trs, JobHandle dependency)
{
return new Job
{
positions = positions,
normals = normals,
…
}.ScheduleParallel(positions.Length, resolution, dependency);
}
}
|
由于这个偏移效果是在GPU上完成的,所以我们需要修改HashVisualization类,把法线数据发送到GPU,就像发送位置点数据.注册一个对应Shader的ID,设置normals和normalsBuffer.
1
2
3
4
5
6
7
8
9
10
11
12
13
14
15
16
17
18
19
20
21
22
23
24
25
26
27
28
29
30
31
32
33
34
35
36
37
38
39
40
41
42
43
44
| private static int hashesId = Shader.PropertyToID("_Hashes");
private static int positionsId = Shader.PropertyToID("_Positions");
private static int normalsId = Shader.PropertyToID("_Normals");
private static int configId = Shader.PropertyToID("_Config");
…
NativeArray<float3> positions, normals;
ComputeBuffer hashesBuffer, positionsBuffer, normalsBuffer;
…
void OnEnable()
{
isDirty = true;
int length = resolution * resolution;
hashes = new NativeArray<uint>(length, Allocator.Persistent);
positions = new NativeArray<float3>(length, Allocator.Persistent);
normals = new NativeArray<float3>(length, Allocator.Persistent);
hashesBuffer = new ComputeBuffer(length, 4);
positionsBuffer = new ComputeBuffer(length, 3 * 4);
normalsBuffer = new ComputeBuffer(length, 3 * 4);
propertyBlock ??= new MaterialPropertyBlock();
propertyBlock.SetBuffer(hashesId, hashesBuffer);
propertyBlock.SetBuffer(positionsId, positionsBuffer);
propertyBlock.SetBuffer(normalsId, normalsBuffer);
…
}
void OnDisable()
{
hashes.Dispose();
positions.Dispose();
normals.Dispose();
hashesBuffer.Release();
positionsBuffer.Release();
normalsBuffer.Release();
hashesBuffer = null;
positionsBuffer = null;
normalsBuffer = null;
}
|
在Update中把法线数据传入Job,然后设置到normalsBuffer里.
1
2
3
4
5
6
7
8
9
10
| JobHandle handle = Shapes.Job.ScheduleParallel(positions, normals, resolution, transform.localToWorldMatrix, default);
new HashJob
{
…
}.ScheduleParallel(hashes.Length, resolution, handle).Complete();
hashesBuffer.SetData(hashes);
positionsBuffer.SetData(positions);
normalsBuffer.SetData(normals);
|
接着修改Shader代码,让采样点沿着法线移动而不是垂直移动.
1
2
3
4
5
6
7
8
9
10
11
12
13
14
15
16
17
18
19
20
21
| #if defined(UNITY_PROCEDURAL_INSTANCING_ENABLED)
StructuredBuffer<uint> _Hashes;
StructuredBuffer<float3> _Positions, _Normals;
#endif
float4 _Config;
void ConfigureProcedural()
{
#if defined(UNITY_PROCEDURAL_INSTANCING_ENABLED)
unity_ObjectToWorld = 0.0;
unity_ObjectToWorld._m03_m13_m23_m33 = float4(
_Positions[unity_InstanceID],
1.0
);
unity_ObjectToWorld._m03_m13_m23 +=
(_Config.z * ((1.0 / 255.0) * (_Hashes[unity_InstanceID] >> 24) - 0.5)) *
_Normals[unity_InstanceID];
unity_ObjectToWorld._m00_m11_m22 = _Config.y;
#endif
}
|
2.7 边界(Bounds)
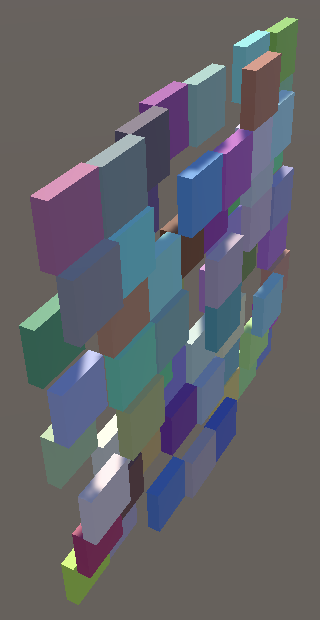
对Hash可视化效果的对象的变换也必须要同时匹配对应的边界.我们必须使用变换以后的坐标点来作为边界的中心点.但是边界的范围大小就比较复杂了,因为边界定义的是一个轴对称的立方体包围盒,而我们生成的形状对象是可以旋转和缩放,如果这个形状对象是另一个可视化对象的子对象,边界计算还会更加复杂.所以我们决定使用Transform类的lossyScale属性,获得它的绝对值并用cmax函数做处理,然后翻倍处理后的数据,再加上偏移数据,最后使用这个计算好的结果作为3个维度上的边界数据.虽然这并不是匹配的最紧密,但是这样的方式方便计算,并且已经够用了.
1
2
3
4
5
| Graphics.DrawMeshInstancedProcedural(
instanceMesh, 0, material,
new Bounds(transform.position,float3(2f * cmax(abs(transform.lossyScale)) + displacement)),
hashes.Length, propertyBlock
);
|
我们并不需要每一帧都重新计算边界,只需要在数据发生变化时才重新计算.所以用一个字段把他存起来方便更新操作.
1
2
3
4
5
6
7
8
9
10
11
12
13
14
| Bounds bounds;
…
void Update()
{
if (isDirty || transform.hasChanged)
{
…
bounds = new Bounds(transform.position, float3(2f * cmax(abs(transform.lossyScale)) + displacement));
}
Graphics.DrawMeshInstancedProcedural(instanceMesh, 0, material, bounds, hashes.Length, propertyBlock);
}
|
3 手动向量化(Manual Vectorization)
如前面所说,Job代码中的自动向量化在我们使用vector类型时就已经失效了.典型的可自动向量化是利用对float4或者int4等数据类型的打包计算代替对单个float或int类型的计算,也就是利用SIMD指令并行计算4个数据.不幸的是这个自动优化效果对于我们使用float3类型的位置和法线数据来说已经不起作用了.但是我们可以通过手动操作一下使向量化计算成为可能.
3.1 向量化的Hash(Vectorized Hash)
我们的SmallXXHash在设计之初就考虑了向量化.为了完成手动向量化的功能,先复制一份SmallXXHash的代码并重新命名为SmallXXHash4,用这个新的类来对4个值参数进行向量化计算.此外还需要包含Mathematics库.
1
2
3
4
5
| using Unity.Mathematics;
public readonly struct SmallXXHash { … }
public readonly struct SmallXXHash4 { … }
|
在这个新类中需要用vector类型的数据替换掉所有的单值类型.由于没有byte型的vertor类型,就需要把对应的方法删掉,primeA在此类当中没有用,也一并删掉.
1
2
3
4
5
6
7
8
9
10
11
12
13
14
15
16
17
18
19
20
21
22
23
24
25
26
27
28
29
| public readonly struct SmallXXHash4
{
const uint primeB = 0b10000101111010111100101001110111;
const uint primeC = 0b11000010101100101010111000111101;
const uint primeD = 0b00100111110101001110101100101111;
const uint primeE = 0b00010110010101100110011110110001;
readonly uint accumulator;
public SmallXXHash4(uint accumulator)
{
this.accumulator = accumulator;
}
public static implicit operator SmallXXHash4(uint accumulator) => new SmallXXHash4(accumulator);
public static SmallXXHash4 Seed(int seed) => (uint)seed + primeE;
static uint RotateLeft(uint data, int steps) => (data << steps) | (data >> 32 - steps);
public SmallXXHash4 Eat(int data) => RotateLeft(accumulator + (uint)data * primeC, 17) * primeD;
public static implicit operator uint(SmallXXHash4 hash) { … }
}
|
下一步,把所有的int和uint类型替换为int4和uint4.唯一不用改的就是steps参数,因为他必须是int类型.
1
2
3
4
5
6
7
8
9
10
11
12
13
14
15
16
17
18
19
20
| readonly uint4 accumulator;
public SmallXXHash4(uint4 accumulator)
{
this.accumulator = accumulator;
}
public static implicit operator SmallXXHash4(uint4 accumulator) => new SmallXXHash4(accumulator);
public static SmallXXHash4 Seed(int4 seed) => (uint4)seed + primeE;
static uint4 RotateLeft(uint4 data, int steps) => (data << steps) | (data >> 32 - steps);
public SmallXXHash4 Eat(int4 data) => RotateLeft(accumulator + (uint4)data * primeC, 17) * primeD;
public static implicit operator uint4(SmallXXHash4 hash)
{
uint4 avalanche = hash.accumulator;
…
}
|
这样手动向量化工作就完成了.让我们添加一个隐式转换来方便地使用这个类的功能.
1
2
3
4
5
6
| public readonly struct SmallXXHash
{
…
public static implicit operator SmallXXHash4(SmallXXHash hash) => new SmallXXHash4(hash.accumulator);
}
|
我们可以反过来转换这两个类型吗?
从单个值类型转换到向量化类型只需要简单的复制内部的值就行了,但是反过来需要把4个值变为一个,并没有直接的方法可以做到这一点,所以不行.
3.2 向量化的HashJob(Vectorized Hash Job)
接下来,我们将对HashJob类进行向量化.先把hash的输入输出字段全部变成4合1模式的类型.
1
2
3
4
| [WriteOnly]
public NativeArray<uint4> hashes;
public SmallXXHash4 hash;
|
我们还需要并行处理4个点的数据.4合1的坐标点数据可以被存储在一个float3x4的矩阵当中,其中每一列包含一组坐标点位置数据.
1
2
| [ReadOnly]
public NativeArray<float3x4> positions;
|
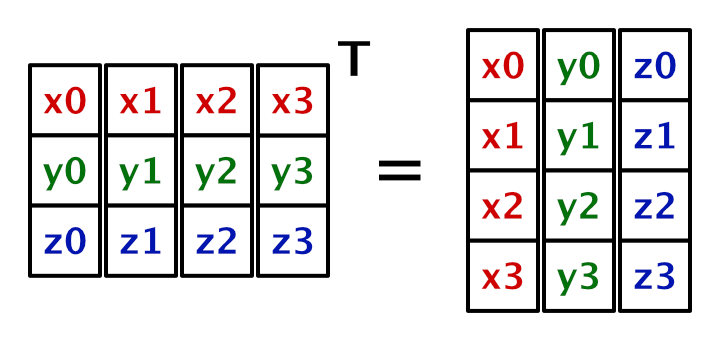
然而,为了向量化计算,Execute函数需要为x,y,z三个轴向单独生成向量,而不是一个向量装一个点.我们可以通过生成一个位置矩阵的转置矩阵来获得需要的数据格式布局float4x3,接着我们就可以使用向量化的方式计算u,v,w.这里先暂时忽略域的变换操作.
1
2
3
4
5
6
7
8
9
10
| public void Execute(int i)
{
float4x3 p = transpose(positions[i]);
int4 u = (int4)floor(p.c0);
int4 v = (int4)floor(p.c1);
int4 w = (int4)floor(p.c2);
hashes[i] = hash.Eat(u).Eat(v).Eat(w);
}
|
现在我们把向量化的数据传给Update中的HashJob.因为已经有了所需的数据了,只需要把位置数据重新解释为带有4个float3类型的组合.NativeArray提供泛型方法Reinterpret用于直接转换,参数需要填入原始数据类型的总长度.由于这种组合方式的hash值数据长度已经变成了以前的1/4了,所以我们也要把长度除以4.
1
2
3
4
5
6
7
| new HashJob
{
positions = positions.Reinterpret<float3x4>(3 * 4),
hashes = hashes.Reinterpret<uint4>(4),
hash = SmallXXHash.Seed(seed),
domainTRS = domain.Matrix
}.ScheduleParallel(hashes.Length / 4, resolution, handle).Complete();
|
注意数组的长度必须能被4整除,否则就会出大问题.一定要确保分辨率是偶数.
没有任何现成的数学方法可以让一个3x4和4x3的变换矩阵相乘.所以添加一个TransformPositions方法到HashJob类中自行计算.用这两个矩阵作为函数的参数,最后返回一个转换后的4x3-XYZ列矩阵.现在先让它返回一个未经变换的数据.在Execute中做如下操作.
1
2
3
4
5
6
7
| float4x3 TransformPositions(float3x4 trs, float4x3 p) => p;
public void Execute(int i)
{
float4x3 p = TransformPositions(domainTRS, transpose(positions[i]));
…
}
|
这个变换计算是一个常规矩阵乘法,第四列的平移计算只是单纯的加法.从之前的矩阵乘法描述中我们可以得知,最后一部分是与常数1相乘,所以我们可以省略掉这部分计算.
因为位置数据矩阵(p)已经被向量化了,所以乘法是对它的整列进行计算,而不是对单个数据.
1
2
3
4
5
| float4x3 TransformPositions(float3x4 trs, float4x3 p) => float4x3(
trs.c0.x * p.c0 + trs.c1.x * p.c1 + trs.c2.x * p.c2 + trs.c3.x,
trs.c0.y * p.c0 + trs.c1.y * p.c1 + trs.c2.y * p.c2 + trs.c3.y,
trs.c0.z * p.c0 + trs.c1.z * p.c1 + trs.c2.z * p.c2 + trs.c3.z
);
|
现在我们的可视化效果依然可以正常运行,唯一的变化是HashJob类已经被向量化改装了.不过Burst编译器诊断的结果任然显示并没有向量化,因为它不知道我们手动做了这个操作.汇编编译器会知道我们确实使用了SIMD指令集,将会并行生成4个hash值.
3.4 向量化的形状生成(Vectorized Shapes Job)
最后轮到向量化Shapes.Job了.方法也是一样的.首先变positions和normals的数据类型为float3x4.
1
2
3
4
5
6
7
8
9
10
| [WriteOnly]
NativeArray<float3x4> positions, normals;
…
public static JobHandle ScheduleParallel(
NativeArray<float3x4> positions,
NativeArray<float3x4> normals,
int resolution,
float4x4 trs,
JobHandle dependency) { … }
|
在Execute,用一个4x2的列矩阵来对UV坐标进行向量化.
1
2
3
4
| float4x2 uv;
uv.c1 = floor(invResolution * i + 0.00001f);
uv.c0 = invResolution * (i - resolution * uv.c1 + 0.5f) - 0.5f;
uv.c1 = invResolution * (uv.c1 + 0.5f) - 0.5f;
|
我们必须用向量化的索引值来代替原来的单个索引值.用原索引乘以4f再加上float(0,1,2,3).
1
2
3
| float4 i4 = 4f * i + float4(0f, 1f, 2f, 3f);
uv.c1 = floor(invResolution * i4 + 0.00001f);
uv.c0 = invResolution * (i4 - resolution * uv.c1 + 0.5f) - 0.5f;
|
下一步,我们还需要一个TRS变换矩阵,但是需要同时处理位置和法线数据.为了在一个函数里面完成两个功能,先把TransformPositions从HashJob里复制到Shapes.Job里,然后改名为TransformVectors,最后还需要一个默认为1的w分量,与位置数据相乘.
1
2
3
4
5
| float4x3 TransformVectors(float3x4 trs, float4x3 p, float w = 1f) => float4x3(
trs.c0.x * p.c0 + trs.c1.x * p.c1 + trs.c2.x * p.c2 + trs.c3.x * w,
trs.c0.y * p.c0 + trs.c1.y * p.c1 + trs.c2.y * p.c2 + trs.c3.y * w,
trs.c0.z * p.c0 + trs.c1.z * p.c1 + trs.c2.z * p.c2 + trs.c3.z * w
);
|
在Execute中使用平面坐标生成一个4x3-XYZ-列矩阵,并对其应用TRS变换,然后转置这个结果使它可以被赋值到positions变量上进行输出.
1
| positions[i] = transpose(TransformVectors(positionTRS, float4x3(uv.c0, 0f, uv.c1)));
|
用同样的方法对法线数据做处理,但是这次TransformVectors函数的第三个参数要填0,这样会忽略掉位移变换的结果.Burst编译器会优化掉所有与常数0相乘的代码.接下来标准化(normalize)法线数据,然后把它们存储到一个3x4的矩阵里面.
1
2
| float3x4 n = transpose(TransformVectors(positionTRS, float4x3(0f, 1f, 0f), 0f));
normals[i] = float3x4(normalize(n.c0), normalize(n.c1), normalize(n.c2), normalize(n.c3));
|
3.5 向量化的数组(Vectorized Arrays)
因为在两个Job功能里都需要向量化的数组,所以我们直接定义这样的数组类型而不要动态转换.
1
2
3
| NativeArray<uint4> hashes;
NativeArray<float3x4> positions, normals;
|
在OnEnable里创建数组和缓冲区之前,需要把长度除以4.
1
2
3
4
5
6
7
8
9
10
11
| void OnEnable()
{
isDirty = true;
int length = resolution * resolution;
length /= 4;
hashes = new NativeArray<uint4>(length, Allocator.Persistent);
positions = new NativeArray<float3x4>(length, Allocator.Persistent);
normals = new NativeArray<float3x4>(length, Allocator.Persistent);
…
}
|
为了匹配ComputeBuffer的大小,我们必须要把容量设置为之前的4倍.
1
2
3
| hashesBuffer = new ComputeBuffer(length * 4, 4);
positionsBuffer = new ComputeBuffer(length * 4, 3 * 4);
normalsBuffer = new ComputeBuffer(length * 4, 3 * 4);
|
还需要把传入缓冲区的数据重新解释成对应的数据类型.
1
2
3
| hashesBuffer.SetData(hashes.Reinterpret<uint>(4 * 4));
positionsBuffer.SetData(positions.Reinterpret<float3>(3 * 4 * 4));
normalsBuffer.SetData(normals.Reinterpret<float3>(3 * 4 * 4));
|
我们可以直接把向量化后的数据传入到ComputeBuffer中吗?
CPU和GPU对数据格式都有自己的解析方法,所以在某些时候会遇到数据错位的情况.所以我们必须确保传入ComputerBuffer的数据未被向量化.
我们同样可以支持奇数分辨率.例如假设分辨率是3,那么初始化长度就是9,但是向量化之后的长度是2,只能容纳前8个数据.不过我们可以增加1个长度来容纳第9个数据,这就意味着我们还要增加4个位置,其中3个是冗余的,不过这多出来的数据是微不足道的开销.我们可以让向量化的方式匹配所有分辨率,只需要在OnEnable中处理一下奇偶问题.(length & 1)等于0为偶数,等于1为奇数.
1
2
| int length = resolution * resolution;
length = length / 4 + (length & 1);
|
在Update中,我们不再需要为HashJob的初始化重新解释数据了.还要修改一下调度时的数组长度,因为它已经在向量化中被重新计算了.
1
2
3
4
5
6
7
| new HashJob
{
positions = positions,
hashes = hashes,
hash = SmallXXHash.Seed(seed),
domainTRS = domain.Matrix
}.ScheduleParallel(hashes.Length, resolution, handle).Complete();
|
最后,为了正确地绘制实例,在DrawMeshInstancedProcedural传入分辨率的平方作为参数.
1
2
3
4
5
6
7
8
| Graphics.DrawMeshInstancedProcedural(
instanceMesh, 0, material,
new Bounds(
transform.position,
float3(2f * cmax(transform.lossyScale) + displacement)
),
resolution * resolution, propertyBlock
);
|
4 更多的形状(More Shapes)
现在两个Job功能都已经向量化了,下一步要制作两个可选的形状生成器.虽然可以创建额外的Job功能类来完成,但是大部分的代码结构都是一样的.所以我们选择用模板代码来写.
4.1 平面结构(Plane Struct)
为了支持更多的形状生成,我们把位置和法线生成功能提到更高一层上来,拿到Shapes类中.每一个不同的Shape都可以使用自己独特的方法来生成数据,但是我们准备将这个功能以UV为基础来实现.为了避免重复的编码,我们直接从Job.Execute中复制计算UV部分的代码,放到Shapes类里这个名叫IndexTo4UV的静态方法中.修改一下UV的范围,把后面的-0.5的代码删掉,让它从[-0.5,0.5]变为[0,1],
1
2
3
4
5
6
7
8
9
10
11
12
13
14
| public static class Shapes
{
public static float4x2 IndexTo4UV(int i, float resolution, float invResolution)
{
float4x2 uv;
float4 i4 = 4f * i + float4(0f, 1f, 2f, 3f);
uv.c1 = floor(invResolution * i4 + 0.00001f);
uv.c0 = invResolution * (i4 - resolution * uv.c1 + 0.5f);
uv.c1 = invResolution * (uv.c1 + 0.5f);
return uv;
}
…
}
|
每个形状(Shape)中唯一特别的东西是它们要如何设置自己的位置和法线数据.为了传递这些不同的数据,新建一个Point4的结构体来完成此任务,里面包含向量化的位置和法线字段.
1
2
3
4
5
6
7
8
9
| public static class Shapes
{
public struct Point4
{
public float4x3 positions, normals;
}
…
}
|
从Job.Execute中提取生成平面的代码,新建一个Plane结构体,包含一个使用这段代码的函数GetPoint4,输入参数分别为索引,分辨率,分辨率倒数,返回值为Point4.因为上面修改过UV的范围,这里就得减去0.5来使得平面的中心点维持在原点.
1
2
3
4
5
6
7
8
9
10
11
12
| public struct Plane
{
public Point4 GetPoint4(int i, float resolution, float invResolution)
{
float4x2 uv = IndexTo4UV(i, resolution, invResolution);
return new Point4
{
positions = float4x3(uv.c0 - 0.5f, 0f, uv.c1 - 0.5f),
normals = float4x3(0f, 1f, 0f)
};
}
}
|
Plane结构体不包含任何字段,唯一的作用就是提供GetPoint4方法.我们可以在Job.Execute中使用**default(Plane)**来调用此方法,它将代替以前与平面相关的代码.
1
2
3
4
5
6
7
8
9
10
11
12
13
14
15
| public void Execute(int i)
{
Point4 p = default(Plane).GetPoint4(i, resolution, invResolution);
positions[i] = transpose(TransformVectors(positionTRS, p.positions));
float3x4 n = transpose(TransformVectors(positionTRS, p.normals, 0f));
normals[i] = float3x4(normalize(n.c0), normalize(n.c1), normalize(n.c2), normalize(n.c3));
}
|
4.2 形状的接口(Shape Interface)
现在的目标是,能使用不同的形状结构体来生成不同的形状.为了做出这样的泛型功能,我们需要做一个接口功能,来规定公共的方法和字段.
接口使用interface关键字来声明,约定俗成使用I作为名称前缀.因此我们将其命名为IShap,在里面仅声明一个GetPoint4函数名称,没有代码部分,以分号结束.接口里的成员默认访问类型是public,所以不需要访问修饰符.Plane需要继承于这个接口并实现其中的功能.
1
2
3
4
5
6
7
8
9
| public interface IShape
{
Point4 GetPoint4 (int i, float resolution, float invResolution);
}
public struct Plane : IShape
{
public Point4 GetPoint4 (int i, float resolution, float invResolution) { … }
}
|
4.3 泛型Job(Generic Job)
下一步是把Job功能泛型化,将其转化为模板类型.我们将泛型类型参数写在尖括号中,并将其附加到Job的类型声明里.约定俗成,类型参数名称是一个字母,由于这个参数将表示一个形状的类型,让我们将其命名为S.
1
| public struct Job<S> : IJobFor { … }
|
我们将通过两种方式来限制泛型S的类型.第一,我们希望它是一个struct类型.第二,它必须是IShape类型.通过使用where关键字来完成这个操作.
1
| public struct Job<S> : IJobFor where S : struct, IShape { … }
|
现在我们就可以在Execute中使用这个泛型类型来代替硬编码了.
1
2
3
4
5
6
| public void Execute(int i)
{
Point4 p = default(S).GetPoint4(i, resolution, invResolution);
…
}
|
现在就必须要在ScheduleParallel方法调用时明确指出Job的泛型类型,就如同我们创建NativeArray类型或者其他泛型对象那样.这里也应该是与Job的类型相同,我们任然传入类型S.
1
2
3
4
| return new Job<S>
{
…
}.ScheduleParallel(positions.Length, resolution, dependency);
|
最后,为了实现这个泛型功能,我们需要在HashVisualization.Update中写清楚形状的具体类型信息.
1
| JobHandle handle = Shapes.Job<Shapes.Plane>.ScheduleParallel(positions, normals, resolution, transform.localToWorldMatrix, default);
|
请注意,这时在Burst编译器里面我们的类型信息变成了Shapes.Job`1[Shapes.Plane]而不是原来的Shapes.Job,其他的汇编代码与以前相同.
4.4 球和环(Sphere and Torus)
现在就可以很方便的增加更多的形状生成器了.让我们再写两个,先从球体开始,可以从Mathematical Surfaces教程中把代码复制过来使用.唯一不同的地方在于不同的UV范围,我们需要翻倍在sin和cos中的参数,还需要交换sin和cos的位置来计算s和c1.我们将半径设置为0.5以便使球体的直径与标准方块相同.
因为这是一个球体,所以我们可以直接使用位置点数据作为法线数据.不过向量的长度是0.5,然而这不是问题,因为在变换应用之后,会标准化这个数据.
1
2
3
4
5
6
7
8
9
10
11
12
13
14
15
16
17
18
19
| public struct Plane : IShape { … }
public struct Sphere : IShape
{
public Point4 GetPoint4(int i, float resolution, float invResolution)
{
float4x2 uv = IndexTo4UV(i, resolution, invResolution);
float r = 0.5f;
float4 s = r * sin(PI * uv.c1);
Point4 p;
p.positions.c0 = s * sin(2f * PI * uv.c0);
p.positions.c1 = r * cos(PI * uv.c1);
p.positions.c2 = s * cos(2f * PI * uv.c0);
p.normals = p.positions;
return p;
}
}
|
要使用这个球体形状来生成可视化效果,只需要在HashVisualization.Update中修改泛型参数类型.
1
| JobHandle handle = Shapes.Job<Shapes.Sphere>.ScheduleParallel(positions, normals, resolution, transform.localToWorldMatrix, default);
|
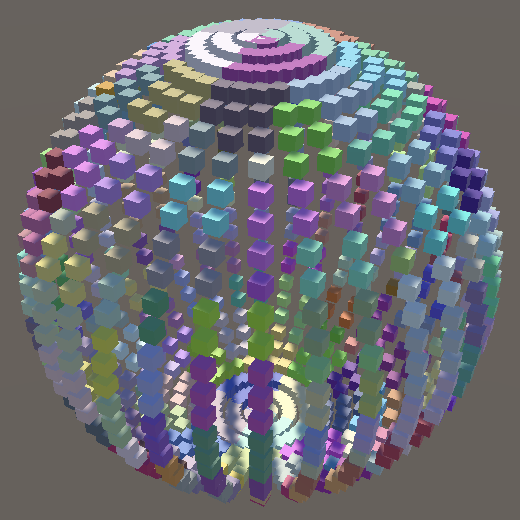
第二个形状做一个环,依然是从Mathematical Surfaces教程中复制代码过来,并再次翻倍sin和cos中的参数.r1赋值0.375,r2赋值0.125.
1
2
3
4
5
6
7
8
9
10
11
12
13
14
15
16
17
18
| public struct Torus : IShape
{
public Point4 GetPoint4(int i, float resolution, float invResolution)
{
float4x2 uv = IndexTo4UV(i, resolution, invResolution);
float r1 = 0.375f;
float r2 = 0.125f;
float4 s = r1 + r2 * cos(2f * PI * uv.c1);
Point4 p;
p.positions.c0 = s * sin(2f * PI * uv.c0);
p.positions.c1 = r2 * sin(2f * PI * uv.c1);
p.positions.c2 = s * cos(2f * PI * uv.c0);
p.normals = p.positions;
return p;
}
}
|
环表面的法线要比球体稍微复杂一些,它们并不是指向形状的中心,而是指向环表面内部的中心环.这里我们并不需要担心重复的计算代码,因为Burst编译器会优化掉它.
1
2
3
| p.normals = p.positions;
p.normals.c0 -= r1 * sin(2f * PI * uv.c0);
p.normals.c2 -= r1 * cos(2f * PI * uv.c0);
|
现在只需要换个类型数据就能画环了.
1
| JobHandle handle = Shapes.Job<Shapes.Torus>.ScheduleParallel(positions, normals, resolution, transform.localToWorldMatrix, default);
|
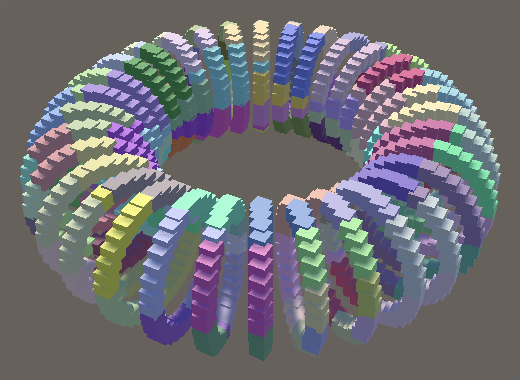
4.5 可选形状(Selecting Shapes)
为了让我们可以在Unity编辑器里面切换不同的形状.需要增加代码控制在调用ScheduleParallel方法时传入的类型数据.我们再次使用Mathematical Surfaces教程中的方法,采用枚举选择和静态委托数组的方式.
在Shapes中添加一个ScheduleDelegate的委托方法来匹配ScheduleParallel方法.
1
2
3
4
| public delegate JobHandle ScheduleDelegate (
NativeArray<float3x4> positions, NativeArray<float3x4> normals,
int resolution, float4x4 trs, JobHandle dependency
);
|
哪些形状可以使用取决于HashVisualization类,所以我们需要添加一组枚举和对应它的静态数组,数组中是对应的代理函数.
1
2
3
4
5
6
7
8
9
10
11
12
13
| public enum Shape { Plane, Sphere, Torus }
static Shapes.ScheduleDelegate[] shapeJobs =
{
Shapes.Job<Shapes.Plane>.ScheduleParallel,
Shapes.Job<Shapes.Sphere>.ScheduleParallel,
Shapes.Job<Shapes.Torus>.ScheduleParallel
};
…
[SerializeField]
Shape shape;
|

然后修改一下Update中对应的位置,让枚举值可以控制代理函数.
1
| JobHandle handle = shapeJobs[(int)shape](positions, normals, resolution, transform.localToWorldMatrix, default);
|
目前看似差不多了,但是有一个地方还会出问题.就是对球体和环使用非对称的缩放.比如一个几乎扁平的球体,偏移的效果任然是从球体中心计算的,而不是球体表面.结果就是偏移效果过于扁了.
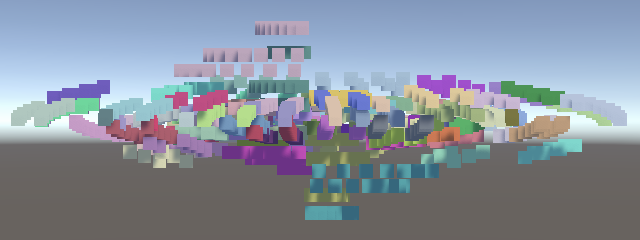
Sphere with Y scale 0.01 and 0.5 displacement.
这个问题出现的原因是非对称的缩放搞乱了法线方向.它们必须与一个不同的变换矩阵相乘.为了解决这个问题,需要在Shapes.Job中增加一个法线的变换矩阵来计算法线.
1
2
3
4
5
6
7
8
9
10
11
| public float3x4 positionTRS, normalTRS;
…
public void Execute(int i)
{
…
float3x4 n = transpose(TransformVectors(normalTRS, p.normals, 0f));
…
}
|
为了生成正确的表面法线,我们需要在ScheduleParallel函数中使用transpose(inverse(trs))计算TRS矩阵的逆矩阵的转置矩阵.
1
2
3
4
5
6
7
8
9
10
11
12
| public static JobHandle ScheduleParallel(
NativeArray<float3x4> positions, NativeArray<float3x4> normals,
int resolution, float4x4 trs, JobHandle dependency)
{
float4x4 tim = transpose(inverse(trs));
return new Job<S>
{
…
positionTRS = float3x4(trs.c0.xyz, trs.c1.xyz, trs.c2.xyz, trs.c3.xyz),
normalTRS = float3x4(tim.c0.xyz, tim.c1.xyz, tim.c2.xyz, tim.c3.xyz)
}.ScheduleParallel(positions.Length, resolution, dependency);
}
|
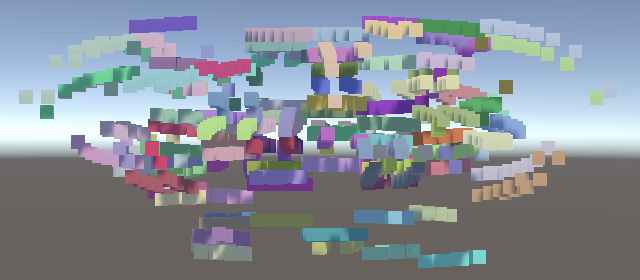
4.7 正八面结构的球体(Octahedron Sphere)
我们现在生成的球体被称为UV球体,它是由一圈一圈的环叠在一起而构成,并在这样的环在极点上会退化为点.点的分布会极度不均匀,在赤道附近稀疏,在极点附近密集.让我们采用另一种方式来生成—正八面体.
想要做一个正八面结构的球体,首先需要在圆点上生成一个八面体,然后标准化它上面所有的点.可以通过简单几步从[0,1]的UV坐标来生成.让我们先从中心点在原点的XY平面开始.
1
2
3
4
5
6
7
8
9
10
11
12
13
14
15
16
17
| public struct Sphere : IShape
{
public Point4 GetPoint4(int i, float resolution, float invResolution)
{
float4x2 uv = IndexTo4UV(i, resolution, invResolution);
Point4 p;
p.positions.c0 = uv.c0 - 0.5f;
p.positions.c1 = uv.c1 - 0.5f;
p.positions.c2 = 0f;
p.normals = p.positions;
return p;
}
}
|
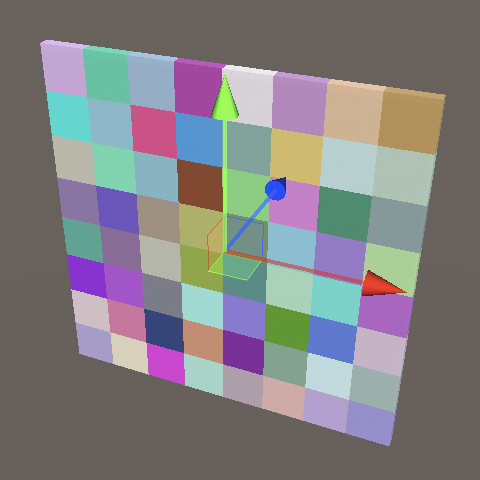
第二步是沿着Z方向移动采样点来创建切型面,把z设置为0.5,然后依次减去x和z的绝对值.这样就生成了一个八面体的一半.另一半是开放的.
1
| p.positions.c2 = 0.5f - abs(p.positions.c0) - abs(p.positions.c1);
|
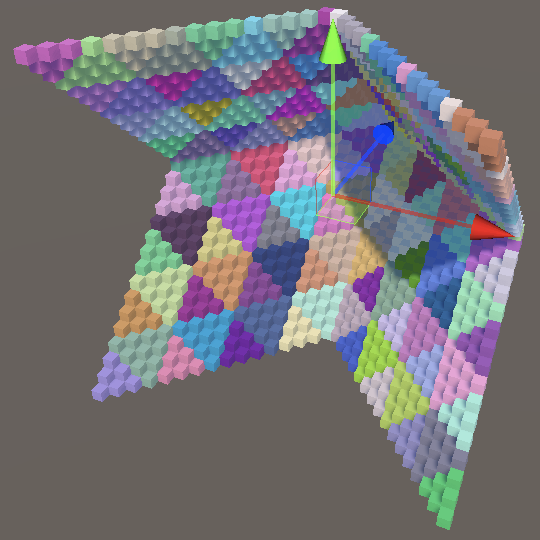
在Z轴的正方向八面体已经完成了.为了在负方向上完成整个图形,需要一个Z负轴上的偏移量.确保最小值为0来使正方向不受影响.
1
2
| p.positions.c2 = 0.5f - abs(p.positions.c0) - abs(p.positions.c1);
float4 offset = max(-p.positions.c2, 0f);
|
我们需要分别在X,Y轴上加减这个变量.比如X轴是负,就加,反之则减.Y轴也是一样.可以用select函数来方便的完成这个操作.
1
2
3
| float4 offset = max(-p.positions.c2, 0f);
p.positions.c0 += select(-offset, offset, p.positions.c0 < 0f);
p.positions.c1 += select(-offset, offset, p.positions.c1 < 0f);
|
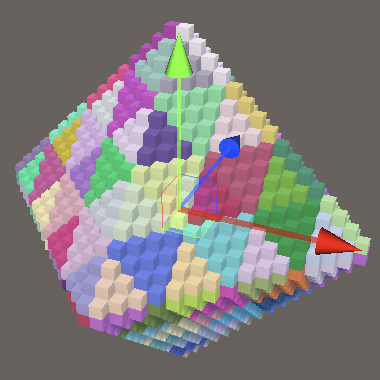
最后,想要把正八面体变成半径为0.5的球体,需要用0.5除以向量的长度,我们由勾股定理可以得知计算公式,使用rsqrt函数来完成平方求倒的组合计算.
1
2
3
4
5
6
7
8
9
10
11
12
| p.positions.c1 += select(-offset, offset, p.positions.c1 < 0f);
float4 scale = 0.5f * rsqrt(
p.positions.c0 * p.positions.c0 +
p.positions.c1 * p.positions.c1 +
p.positions.c2 * p.positions.c2
);
p.positions.c0 *= scale;
p.positions.c1 *= scale;
p.positions.c2 *= scale;
p.normals = p.positions;
|
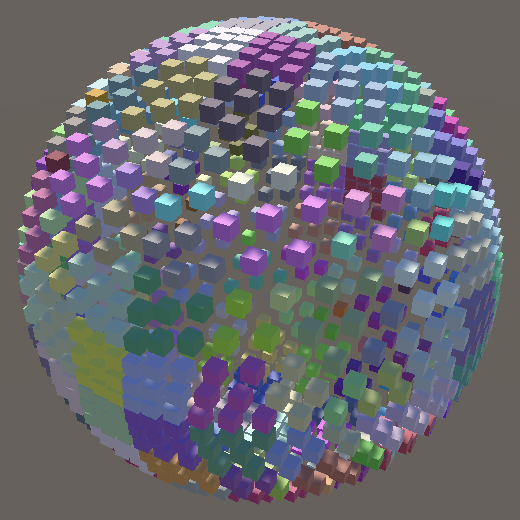
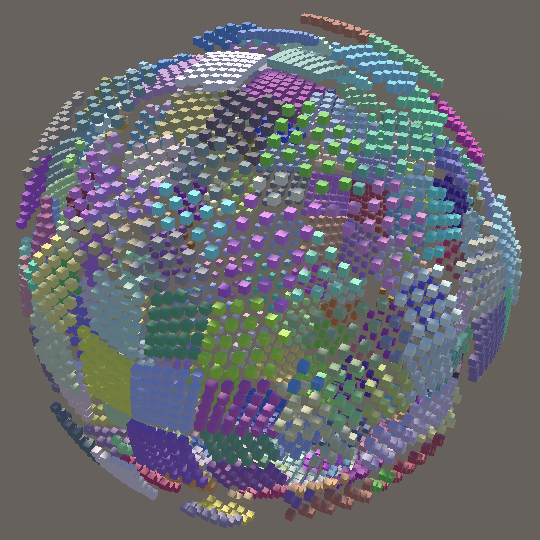
与UV球体相比,八面体球体有6个聚集位而不是只有极点上的2个,这样点的分布就更加均匀.
4.8 整体缩放(Instance Scale)
球体和环的采样点比平面来说更加的分散,更难感觉出它们的表面.
分辨率64,偏移1
最后通过向HashVisualization类添加一个可配置选项来结束这篇教程,这个动态配置可以让可视化效果的实例更坚实,或者更稀疏.
1
2
| [SerializeField, Range(0.1f, 10f)]
float instanceScale = 2f;
|

实例的缩放需要在OnEnable中除以分辨率然后送到GPU中去计算,而不是除以分辨率的倒数.
1
| propertyBlock.SetVector(configId, new Vector4(resolution, instanceScale / resolution, displacement));
|
原文授权协议
原文项目仓库地址
我写的单CPU端萌新入坑版项目地址

